

What you need
- The event name, date, start time and venue.
- Who is hosting.
- Optional: up to 10 photos, a short video (up to 15 seconds) and a song.
Step by step
Choose the occasion
Pick what you're celebrating (wedding, birthday, baby shower and more). Sensible defaults are set for you. No account is needed yet.
Add the event details
Type the event name, who you're celebrating, the date, time and venue, or use 'Fill in by voice' and check what was heard. A ready-made invitation message is written for you to edit.
Choose a design
Browse the invitation gallery by category, colour or style, and preview a design with your own names before choosing it.
Add photos
Add up to 10 photos; they're resized for you.
Add a video
Optionally add a short video of up to 15 seconds.
Add sound
Choose a song from the music list or upload your own MP3, and a spoken greeting if you like. Sound only plays when a guest presses play.
Add optional details
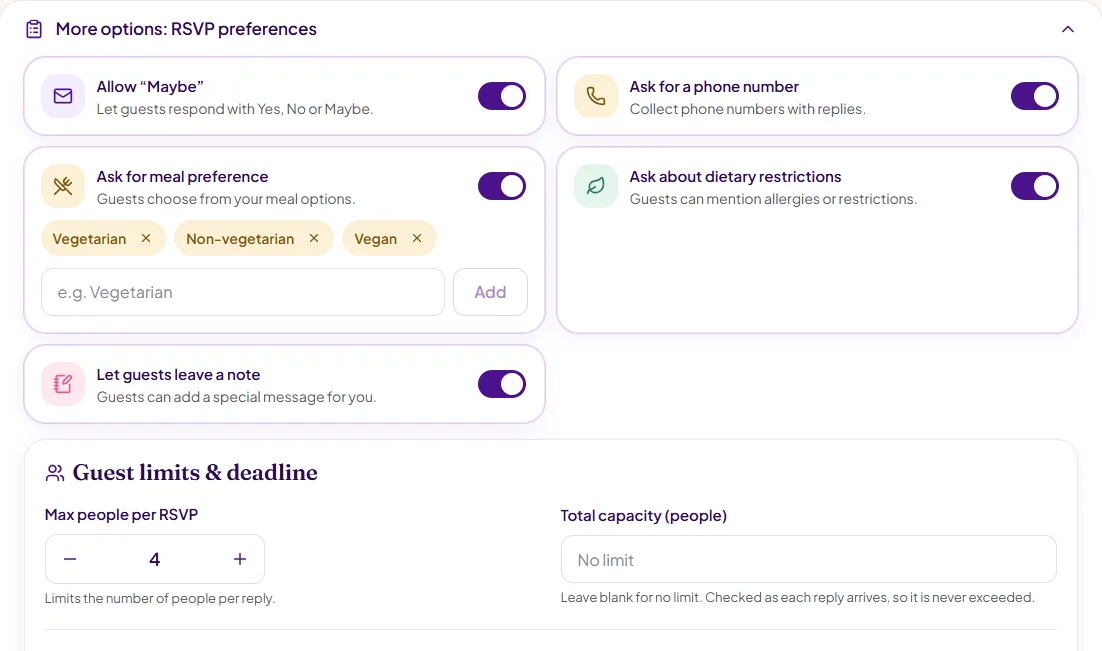
Switch on only what you need: reply-by date, dress code, contact, special instructions, host name. Under 'RSVP preferences' choose maybe, phone number, meal choices, dietary needs, people per reply and total capacity.
Preview and publish
Check the card and the details summary, then publish.
Sign in to save
Create a free account (or sign in) so you can edit the invitation and see replies.
Share one link
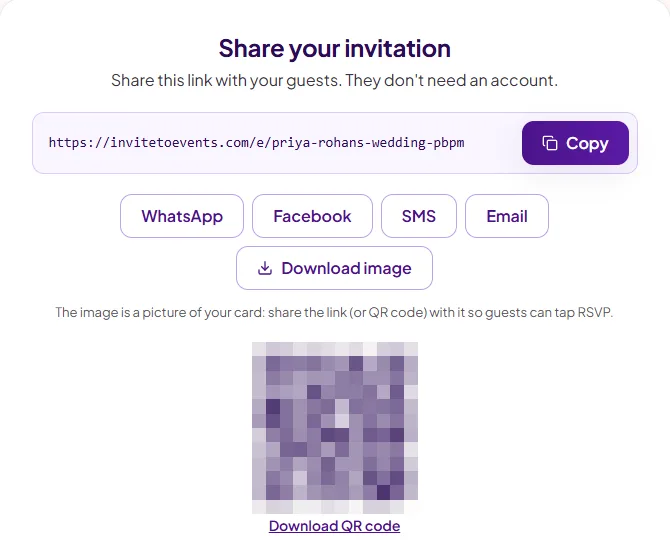
Copy the link or tap WhatsApp, Facebook, SMS or Email on the Share screen. You can also download the card as an image and a QR code for printing.
Common mistakes
| Mistake | Better |
|---|---|
| Skipping the reply-by date | Set one so you know when to follow up |
| Sharing only the downloaded image | Share the link: the image can't collect replies |
| Turning on every detail | Only the details guests need |
Troubleshooting
I need to change the date after sharing.
Edit the invitation. The link stays the same, so guests see the new date.
A guest can't open the link.
Send it by SMS or email instead of WhatsApp, or give them the QR code to scan.
Is it really free?
Creating the invitation and collecting RSVPs is free; see pricing for details and any limits.
Can I make it on my phone?
Yes. Every step works on a phone, including adding photos from your gallery.
Summary
- Pick the occasion and design, add details, photos and music.
- Choose RSVP preferences, publish and share one link.
- Follow replies as described in how to track RSVPs. Creating the invitation and collecting RSVPs is free (pricing).
How this guide was made: drafted with AI assistance, then reviewed and edited by the inviteToevents team at Shreeda Events LLC. Product steps describe features that exist on inviteToevents today.
Make your invitation now
Pick a design, add your details and share one link. Creating it and collecting RSVPs is free.
Start with this design